Whoops, I forgot to write this post after I published Catena. So let's see if I can still remember what I learned...
1.) Spend time on what matters
If you have played Catena, then you know that I included a "Custom" mode that allows you to change almost every aspect of the game. This is actually one of my personal favorite parts of the app, because it's not just the same thing over and over. But the problem is that very few people play Custom games, because they give no sense of accomplishment. What I mean by that is that I did not provide leaderboards or achievements for Custom games. There's really no point; if you can change all of the settings for the game, then a high score is meaningless. And the only type of achievement that would make sense is one that would require the user to create an unstable game just to rack up points. Neither of these is fun or interesting, which is why I decided to keep all achievements and leaderboards exclusive to Classic and Extreme modes. But since the game itself is so simple, the only real incentive users have is to compete for leaderboard spots.
But I am drifting away from the point of this post. The biggest problem with the whole situation is that I spent a lot of time getting Custom mode to work well. It required a lot of new code, over 100 new drawables, and a significant amount of testing. I was very pleased with the result, but in the end it is just a small addition that most users might play only a few times. If I were to guess, I would say I spent about 30-40% of the entire development process working on a feature that is only used about 5% of the time. And that sucks.
So what I'm trying to say is this: Try to put the most effort into those features which will be used the most. Not that you should skimp out on quality in certain areas just because you think that it will not be used often, but if something will take you a very long time to implement, it might not be worth including right away. You can always update later if you do find the time to get everything working. That is, assuming you don't have someone over you telling you what needs to be the priority.
2.) Get the word out
Advertise your app! This is something that I did not do very well, and it shows. Personally, I hate self-promotion because it feels like I am just spamming. I included social features in my app because I don't mind other people promoting my app for me, but I have a hard time going out to websites and letting people know about my app. I've been reading some advice from other devs about how to raise your download numbers, and I think this is the most popular answer. One person I read said that he spent an entire week just posting about his app on various Android app websites. In contrast, I spent about 2 or 3 hours maximum, posting to Facebook and a few small groups I know. This is where the social features I built in don't really help. Most of the people who have downloaded my app are either friends or those friends' friends. So you can share your score on Facebook, but most of the people who see that have already heard about it, because many of them are already friends with me. Since I didn't spend much effort at all to advertise outside of my Facebook contacts, my game has gone almost completely unnoticed.
3.) App Store Optimization
This is another area in which I did not do too well. As you may know, Google Play already has over a million apps in its store. The market is already over-saturated, so unless you have a brilliant and unique idea, it will take a bit more for your app to be noticed among thousands of others. This is called "App Store Optimization", or ASO. I'm not going to pretend I really know anything about this, (as you can probably tell by looking at my app's store pages,) so if you are interested in learning more I would recommend Google. But basically the idea is to make sure that the store page for your app is as optimal as possible for bringing in downloads. I spent only a few hours creating the description and visuals for my page, because it didn't really interest me. In retrospect, I should have spent much more time on improving the quality of my store page. What's the point of spending weeks creating an app, only to have it ignored because the store page doesn't make it seem like that much fun?
I do wish that Google would let us know how many page views each store page has. That way you could see if users are having trouble finding your app in the first place, or if they can find it but simply choose not to download it.
4.) Make sure that you actually have a good idea
This one is pretty simple. Before you even start working on an app, make sure that it is something that people will actually use. To be honest, I think this is the biggest flaw with Catena. It may be addicting for the first few hours, but most people will become bored of it after a week. I personally was kind of tired of it even before release because the initial fun had already worn off while I was testing.
Of course, all of this can be ignored if you are just creating apps for fun and/or experience. If you are having fun and learning, then in the end it doesn't really matter what you are working on. I am very glad that I can say that this statement applied to me. Even though higher download numbers would be nice, in the end the development experience is what counts.
This may be my last post, at least for long time. I have returned to school for my final year, and I won't have much time for Android development, aside from small updates to my already published apps. So... yep. Goodbye I guess.
Wednesday, September 3, 2014
Friday, August 8, 2014
Catena
I have just released another app: Catena!
Catena is a game with a simple premise: Tap a tile to make that tile start rotating. As tiles rotate, they will hit their neighbors, which will make the neighbors rotate. As you can imagine, this process can explode in a chain reaction of turning tiles. The goal is to create the biggest possible chain from your initial tap.
In Classic mode, that's all there is to it. But in Extreme mode, various power-ups will spawn that can drastically effect the course of the game. For example, one power-up will turn large groups of tiles at once, and another will give you an extra tap to spend as you choose. And if that's not enough, I've also included Custom mode, where you can control almost every single aspect of the game. You can change how the tiles are laid out, how often to spawn power-ups, the number of sides that will set off other tiles, etc.. According to my calculations, there are nearly 10 million different combinations of games you can play in custom mode. Pretty sweet.
I've added some other cool things too: You can customize the entire look and feel of the game. Colors, tile styles, and sound effects can all be changed at your leisure. I've also included Google Play Games Services, so you can earn achievements and post your high scores to leaderboards, as well as the ability to post your scores to Facebook to brag to your friends.
And as with my previous app, Catena is free to download! So what are you waiting for?

As always, if you download, be sure to rate and review! I am always open to comments and suggestions.
Catena is a game with a simple premise: Tap a tile to make that tile start rotating. As tiles rotate, they will hit their neighbors, which will make the neighbors rotate. As you can imagine, this process can explode in a chain reaction of turning tiles. The goal is to create the biggest possible chain from your initial tap.
In Classic mode, that's all there is to it. But in Extreme mode, various power-ups will spawn that can drastically effect the course of the game. For example, one power-up will turn large groups of tiles at once, and another will give you an extra tap to spend as you choose. And if that's not enough, I've also included Custom mode, where you can control almost every single aspect of the game. You can change how the tiles are laid out, how often to spawn power-ups, the number of sides that will set off other tiles, etc.. According to my calculations, there are nearly 10 million different combinations of games you can play in custom mode. Pretty sweet.
I've added some other cool things too: You can customize the entire look and feel of the game. Colors, tile styles, and sound effects can all be changed at your leisure. I've also included Google Play Games Services, so you can earn achievements and post your high scores to leaderboards, as well as the ability to post your scores to Facebook to brag to your friends.
And as with my previous app, Catena is free to download! So what are you waiting for?
As always, if you download, be sure to rate and review! I am always open to comments and suggestions.
Wednesday, August 6, 2014
Facebook integration, App Link Hosting
So my goal today was to enable users to share their score on Facebook after each round. It took me the entire day, but I did finally get it working. I ran into quite a few problems and I couldn't find any answers online, so, as always, I hope this post can help someone out.
After importing the code with the help of the Getting Started guide, I jumped straight to the Sharing section. This part of the guide is quite good, and within a few minutes I was able to share a post to my timeline. And after looking through the documentation for a few minutes, I found that Facebook provides an App Link Hosting API, so you can link back to your app from Facebook. It's actually really cool; If you are on mobile and you already own the app, clicking the link immediately launches that app. If you don't have the app installed or you are on an unsupported platform, it launches Google Play to give you a chance to download it. Unfortunately, the documentation for this feature is much less impressive than the Getting Started guide. So it took a few hours of digging, Googling, and trial-and-error to figure out exactly what you need to do to set it up. Looking back, all of the information you need can be found in the documentation, but it's quite spread out and it's not incredibly clear which steps are required. But I digress...
Okay, so here are the steps to create a new App Link object:
This one was due to using the wrong value for "access_token". Before I read the access tokens documentation, I tried to use the "Client Token" value from the app page. Clearly that doesn't work.
After importing the code with the help of the Getting Started guide, I jumped straight to the Sharing section. This part of the guide is quite good, and within a few minutes I was able to share a post to my timeline. And after looking through the documentation for a few minutes, I found that Facebook provides an App Link Hosting API, so you can link back to your app from Facebook. It's actually really cool; If you are on mobile and you already own the app, clicking the link immediately launches that app. If you don't have the app installed or you are on an unsupported platform, it launches Google Play to give you a chance to download it. Unfortunately, the documentation for this feature is much less impressive than the Getting Started guide. So it took a few hours of digging, Googling, and trial-and-error to figure out exactly what you need to do to set it up. Looking back, all of the information you need can be found in the documentation, but it's quite spread out and it's not incredibly clear which steps are required. But I digress...
Okay, so here are the steps to create a new App Link object:
- If you haven't yet, follow the Getting Started guide and link your app to a Facebook App. Under the Settings section, make sure you fill out Package Name and Class Name, and turn on Single Sign On and Deep Linking.
- You need to find your App Token. You can do this by pasting this URL in your browser (replace {app-id} and {app-secret} with the values from the Facebook app page): https://graph.facebook.com/oauth/access_token?client_id={app-id}&client_secret={app-secret}&grant_type=client_credentials
- To create the App Link object, you can use cURL from a terminal. If you don't have cURL, you can use another method. Replace the fields in this command with the appropriate values:
{custom-uri} should follow typical URI structure. You can do really complicated structures if you want, but in my case I only needed one to link to the main activity. So for example, mine looked like: my-app-name://launch - Take the ID from the response and use it to get the final link: https://fb.me/{app-link-id} (If that link doesn't work, use the official method to get the URL)
I ran into a few errors while I was figuring all of this out. So if you get any of these while trying to create the App Link, you might have made the same mistakes I did:
This one was due to using the wrong value for "access_token". Before I read the access tokens documentation, I tried to use the "Client Token" value from the app page. Clearly that doesn't work.
I then tried to use the Graph API Explorer to generate a token. But that generates a User Access token, not an App Access token, so that didn't work either.
This one was due to copy-pasting the wrong App Access token. Somehow I must have grabbed a sample token or something, because the app ID was 123456789000000, haha. Not sure how I missed that one.
Anyway, that's about it. Hopefully this helps someone at some point!
Thursday, July 31, 2014
#threadproblems
Ran into another interesting bug yesterday. In retrospect, I am actually really proud of the fact that I was able to find the issue and fix it so quickly. Thankfully, this time the bug was not due to my own stupidity.
I'm not sure if I have mentioned it yet, but I am currently working on a game. I'll try to keep the details sparse, because they don't really matter. In this game, you have a certain number of clicks to use, and after you run out of clicks, the game ends. Sometimes, this would behave as expected. But the bug was that most of the time when you used your final click, the game would immediately end instead of handling that click.
The game runs in a separate thread from that which handles touch events, so after briefly reviewing my logic it seemed pretty clear that it was some threading problem. I will admit that multi-threading is probably my weakest area of expertise, mainly due to a simple lack of experience. (That, and the fact that I have only had one professor briefly teach threading, and he is one of the worst teachers in our department, so I did not pay much attention.) So maybe this was actually my fault. Maybe I broke some sort of fundamental law of threading, I'm not sure. But anyway, in my game thread, I have a while loop that keeps looping as long as the player has clicks left, and another while loop inside it that runs the actions caused by the player's click. Both of those loop variables were being changed from the UI thread instead of the game thread. So, it basically looked like this:
And the thread that was modifying those values looked something like this:
Now this wasn't too hard; if the touch event happened while the game thread was at the top of the outer loop, (between lines 1 and 2,) it would work fine. Otherwise, it would ignore the last click because _clicksLeft == 0, so it would never even get into the outer loop. So I quickly added another condition to the loop:
Of course, it probably wouldn't happen with exactly this timing, but it's possible. The solution is simple though: just reverse the loop conditions:
Regardless of the execution timing, there is now no case where both conditions are false unless the game is really over. Pretty crazy, I never would have thought the order of loop conditions could be such a problem! Whoever first said "You learn something new every day," I think they might have been on to something.
I'm not sure if I have mentioned it yet, but I am currently working on a game. I'll try to keep the details sparse, because they don't really matter. In this game, you have a certain number of clicks to use, and after you run out of clicks, the game ends. Sometimes, this would behave as expected. But the bug was that most of the time when you used your final click, the game would immediately end instead of handling that click.
The game runs in a separate thread from that which handles touch events, so after briefly reviewing my logic it seemed pretty clear that it was some threading problem. I will admit that multi-threading is probably my weakest area of expertise, mainly due to a simple lack of experience. (That, and the fact that I have only had one professor briefly teach threading, and he is one of the worst teachers in our department, so I did not pay much attention.) So maybe this was actually my fault. Maybe I broke some sort of fundamental law of threading, I'm not sure. But anyway, in my game thread, I have a while loop that keeps looping as long as the player has clicks left, and another while loop inside it that runs the actions caused by the player's click. Both of those loop variables were being changed from the UI thread instead of the game thread. So, it basically looked like this:
And the thread that was modifying those values looked something like this:
Now this wasn't too hard; if the touch event happened while the game thread was at the top of the outer loop, (between lines 1 and 2,) it would work fine. Otherwise, it would ignore the last click because _clicksLeft == 0, so it would never even get into the outer loop. So I quickly added another condition to the loop:
Fixed! ...Or so I thought. I tested it a few times, and it looked like the bug was gone, so I pushed my code and went to go work on something else. Then, I was testing a couple days later, and I ran into the bug again. D:
Clearly my fix had done something, because I didn't see the bug again for a few days. So I tested it a few more times to make sure my eyes weren't playing tricks on me, and it happened again. *sigh* Time to go back to the code... The first thing that came to mind was to try to syncronize the blocks that were dealing with those variables. Unfortunately, that froze my entire UI, so that didn't seem to be an option. I stared at it for about an hour, and then it hit me:
There is a rare edge case where both of the above loop conditions will be false, even if the game is not supposed to be over. _isRunningTurn must be false, _clicksLeft must be 1, and the touch event must happen while the game thread is in the middle of checking the loop condition! If I spread out the timing, it becomes a bit more obvious:
Of course, it probably wouldn't happen with exactly this timing, but it's possible. The solution is simple though: just reverse the loop conditions:
Regardless of the execution timing, there is now no case where both conditions are false unless the game is really over. Pretty crazy, I never would have thought the order of loop conditions could be such a problem! Whoever first said "You learn something new every day," I think they might have been on to something.
Monday, July 21, 2014
Google Play Game Services
A few days ago I finished adding Google Play Game Services to my app, and I wanted to make a quick post about an issue I ran into.
The problem that I had was not mentioned anywhere in the Getting Started guide, and apparently it's not a very common one. It took me a few hours before I finally found the answer online, in a StackOverflow answer that was sitting at the bottom of the page with 0 points.
Specifically, the problem was that whenever I would try to log in to the game services, I would get an error that simply said: "Unknown issue with Google Play Services." The log output wasn't much more helpful, it just said "Internal error, see log for details." So I had to find the actual error in the unfiltered logs (which is a challenge in itself), which said: "Access Not Configured. Please use Google Developers Console to activate the API for your project." This didn't really help, because Google had already activated the API's that I was supposed to need.
So I went back to make sure I hadn't missed anything. I followed the Getting Started guide to the letter. This is important, because there are actually a lot of things that can go wrong, and they are all pretty easy to miss. I double and triple checked all of the common problems. Nope.
Eventually I went back to look at the error message again. The error also included a link to a troubleshooting page, but I had already looked over all of the solutions it offered. However, this time I realized that the link was not to a Google Play troubleshooting page, but a Google Drive troubleshooting page. So I just decided to activate the Drive API on the off chance that it would work. And wouldn't you know, that was the problem! I eventually found this solution in a neglected StackOverflow answer, although I'm still not 100% sure why it was necessary. It automatically activated the other API's, even though I don't need half of them, so why doesn't it just activate the Drive API as well?
Friday, July 11, 2014
Creating a Reusable Dialog Class
The past couple of days I have been working on a task that I thought would be a much more common problem. However, after much Google searching I couldn't find a single page that could help. So, as always, I'm going to dump my code here in case it can help out someone in the future.
 I was trying to make my own Dialog class that I could reuse throughout my app. Since I had to use it in many different ways, I needed to be able to put a custom layout in the middle of the dialog, similar to how the AlertDialog class works. This was the biggest issue; I wanted to completely change the way my dialogs looked, more than you can change by simply creating a style. (Although after looking through the code, I realize that a style could have changed a lot more than I originally thought.) Finally, I wanted to be able to change the colors used in the dialog on the fly. This last one is not really related to the rest, but is just something I am trying to do everywhere in my app. (I'm mentioning it now because my code would be pretty confusing otherwise.) You can see my original concept over to the right, to get an idea of what I was aiming for.
So, here is all of my code:
two_color_dialog.xml
TwoColorDialog.java
dialog_background.xml
dialog_title_box.xml
dialog_close_button.xml
I'm not going to talk about the color-changing aspect, because that's not really the point of the post. There are a couple things I would like to talk about though.
Notice in the dialog's layout, I have a LinearLayout (id/dialog_background) within a FrameLayout, which I use to show the background drawable. Why not just put the background on the FrameLayout and get rid of that LinearLayout? Well, the background drawable automatically surrounds all of its children. Since I wanted the title and close button to float a bit outside of the main dialog, I had to put those two elements outside of the layout that contains the rest of the "inner" dialog elements, so that they wouldn't be surrounded by the background.
The big thing here is the FrameLayout that holds the custom view. This is actually the same method that is used for the AlertDialog class; I ended up looking through the source code for some inspiration. And although I have a lot of code up there, it all really boils down to this:
This is how you can stick different views inside of the dialog, allowing you to use it in different places. It seems pretty simple, but I bring it up because it took me much longer to figure out than I would care to admit. In fact, that is the first of the big issues I ran in to:
Problems and bugs
1.) It took me way too long to figure out how to embed a custom layout within the dialog's layout.
I tried a bunch of different ideas. It seemed like a pretty simple task, but no matter what I tried I couldn't get it to work. I couldn't find any examples online, except for one StackOverflow question. I tried all of the different answers that were suggested, but no dice. I even eventually went to the AlertDialog source code, but even after using the same method, I just couldn't get the inner view to show up!
Of course, the whole time I assumed that my code to display the view was at fault. I took for granted some things that I assumed could never be the problem. (I tend to do that a lot.) In the end, the problem was NOT with my code, but with the layout I was trying to display. When I was trying to test the dialog, I just grabbed a random layout that I was already using elsewhere in my app. The layout that I chose contained only a single ListView. Of course, if you don't set up an adapter for a ListView, it just shows up empty. So my code was working the whole time, but I thought it wasn't because I was adding an empty layout.
2.) The backgrounds of my button drawables were turning black for no reason.
The link above explains the issue pretty well: My buttons were working fine, but for no reason whatsoever the backgrounds suddenly all turned black. I still have absolutely no idea why this happened. I was able to fix the problem by explicitly adding a transparent background to the drawable.
3.) The shadow of my "close" button would disappear after the dialog was shown the first time.
This is even stranger than the last one: My dialog would look perfect, but only the first time it was displayed. After that, the shadow of the close button would disappear. (See the link above for a picture.) I tried debugging to see what was different between the two states. I tried Googling, but my search turned up empty. I tried asking StackOverflow, but all I got was a single comment that didn't even address the issue. As a last resort, I just tried changing things in the drawable to try to find the problem. I knew that the title box didn't have any issues, and that was almost identical. After much trial and error, I narrowed down the problem to the "padding" tag. For whatever reason, the problem only happens when I am using that tag. So I took it out and added position attributes to all of the other layers instead. Again, I have no idea what caused this; I can only assume that it is actually an Android bug.
Finally, here is an example of how to use the dialog:
And here is what the final result looks like:

Not too bad! Obviously not perfect; it only has the functionality that I needed at the moment, so it's not nearly as robust as the original AlertDialog class. But it's definitely a start!
I was trying to make my own Dialog class that I could reuse throughout my app. Since I had to use it in many different ways, I needed to be able to put a custom layout in the middle of the dialog, similar to how the AlertDialog class works. This was the biggest issue; I wanted to completely change the way my dialogs looked, more than you can change by simply creating a style. (Although after looking through the code, I realize that a style could have changed a lot more than I originally thought.) Finally, I wanted to be able to change the colors used in the dialog on the fly. This last one is not really related to the rest, but is just something I am trying to do everywhere in my app. (I'm mentioning it now because my code would be pretty confusing otherwise.) You can see my original concept over to the right, to get an idea of what I was aiming for.So, here is all of my code:
two_color_dialog.xml
TwoColorDialog.java
dialog_background.xml
dialog_title_box.xml
dialog_close_button.xml
I'm not going to talk about the color-changing aspect, because that's not really the point of the post. There are a couple things I would like to talk about though.
Notice in the dialog's layout, I have a LinearLayout (id/dialog_background) within a FrameLayout, which I use to show the background drawable. Why not just put the background on the FrameLayout and get rid of that LinearLayout? Well, the background drawable automatically surrounds all of its children. Since I wanted the title and close button to float a bit outside of the main dialog, I had to put those two elements outside of the layout that contains the rest of the "inner" dialog elements, so that they wouldn't be surrounded by the background.
The big thing here is the FrameLayout that holds the custom view. This is actually the same method that is used for the AlertDialog class; I ended up looking through the source code for some inspiration. And although I have a lot of code up there, it all really boils down to this:
This is how you can stick different views inside of the dialog, allowing you to use it in different places. It seems pretty simple, but I bring it up because it took me much longer to figure out than I would care to admit. In fact, that is the first of the big issues I ran in to:
Problems and bugs
1.) It took me way too long to figure out how to embed a custom layout within the dialog's layout.
I tried a bunch of different ideas. It seemed like a pretty simple task, but no matter what I tried I couldn't get it to work. I couldn't find any examples online, except for one StackOverflow question. I tried all of the different answers that were suggested, but no dice. I even eventually went to the AlertDialog source code, but even after using the same method, I just couldn't get the inner view to show up!
Of course, the whole time I assumed that my code to display the view was at fault. I took for granted some things that I assumed could never be the problem. (I tend to do that a lot.) In the end, the problem was NOT with my code, but with the layout I was trying to display. When I was trying to test the dialog, I just grabbed a random layout that I was already using elsewhere in my app. The layout that I chose contained only a single ListView. Of course, if you don't set up an adapter for a ListView, it just shows up empty. So my code was working the whole time, but I thought it wasn't because I was adding an empty layout.
2.) The backgrounds of my button drawables were turning black for no reason.
The link above explains the issue pretty well: My buttons were working fine, but for no reason whatsoever the backgrounds suddenly all turned black. I still have absolutely no idea why this happened. I was able to fix the problem by explicitly adding a transparent background to the drawable.
3.) The shadow of my "close" button would disappear after the dialog was shown the first time.
This is even stranger than the last one: My dialog would look perfect, but only the first time it was displayed. After that, the shadow of the close button would disappear. (See the link above for a picture.) I tried debugging to see what was different between the two states. I tried Googling, but my search turned up empty. I tried asking StackOverflow, but all I got was a single comment that didn't even address the issue. As a last resort, I just tried changing things in the drawable to try to find the problem. I knew that the title box didn't have any issues, and that was almost identical. After much trial and error, I narrowed down the problem to the "padding" tag. For whatever reason, the problem only happens when I am using that tag. So I took it out and added position attributes to all of the other layers instead. Again, I have no idea what caused this; I can only assume that it is actually an Android bug.
Finally, here is an example of how to use the dialog:
And here is what the final result looks like:
Not too bad! Obviously not perfect; it only has the functionality that I needed at the moment, so it's not nearly as robust as the original AlertDialog class. But it's definitely a start!
Wednesday, July 2, 2014
Colors Are Hard, Man
I ran into a pretty funny bug last night. In this app, I am allowing users to change the background color. The choice of background color is stored in a SharedPreference. As you may know, every time you read from SharedPreferences, you have to provide a default value for the preference you are reading. I was reading an int, so I used a default value of -1 to check if the preference was initialized or not. My code looked like this:
However, the above exception was being thrown every single time, and I couldn't figure out why. I double- and triple-checked the names for typos, just in case I was assigning to "backgronud" or something like that. Nope, no typos. So here's where I initialize the preference, in my main activity's onCreate:
I threw that log message in there to confirm that, yes, the preference was definitely getting initialized. But then why was it going with the default -1 and throwing that exception? I had to break out the debugger before I figured it out.
So, in Android, colors are stored as integers, (which are 32 bits,) with 8 bits for each channel: Alpha, Red, Green, and Blue. So if you write out the value for a color in hex, it takes this format: 0xAARRGGBB. So, for example, the color Green has a value of 0xFF00FF00, and White would be 0xFFFFFFFF. Do you see the issue here?
If not, read up a bit on Two's Compliment and then come back here.
Done? Good.
0xFFFFFFFF in 32-bit Two's Compliment is -1. It was initializing to the same value that I was using to see if it was not initialized. So it would start out at -1, and then throw the error because I thought that a color would never have a value of -1. How wrong I was.
Of course, this is easily fixed by choosing a color value that actually will never be used. I went with 0 instead of -1. I could also just delete the error checking and make it default to white everywhere, but I prefer having the default value assigned in only one place, making it easier to change later.
Friday, June 27, 2014
6/27/14
Whoops, I haven't posted in over a week! I guess I haven't really felt like spending even more time sitting at my computer.
So since my first app is finished, I've spent most of the past week working on a new project. It was much more... theoretical than the last one, so I spent the entire week simply trying to create a proof of concept to see if it was actually feasible. Turns out... it wasn't. So I spent the entire week working and I have nothing to show for it besides a bunch of code that I will probably never look at again.
I was trying to create an app that sampled noise from the microphone and cancelled it when listening with headphones. If everything worked out, I was going to try to make a noise-cancelling music player or something similar. This is another reason I haven't posted in a while; this has never been done before, so I didn't really want to give away anything that I was working on.
Looking back, I suppose that there is a reason it has never been done before. I guess the way that noise-cancelling headphones work is that there is a direct relationship between the outer microphone and the inner speaker, so that any incoming sound is immediately cancelled. I knew I didn't have this kind of control in Android; the closest you can get is by using AudioRecord and AudioTrack to work with the individual samples of sound, and those require a buffer. The buffer has a minimum size (>1), so there's no way you can process the incoming sound before the outside noise has already hit your ear. So I didn't even try to mess with a direct relationship. That wasn't my original idea anyway, so I wasn't discouraged.
My plan was to take a fairly small sample and apply the Fast Fourier Transform to get it in the frequency domain. From there, I was hoping that some frequencies would stand out more than others, and I could use those to create a generic noise wave that could cancel a decent amount of the incoming noise. However, after transforming the signal, nothing really stood out. The noise was comprised of frequencies basically spanning the whole spectrum. I should have just stopped right there, because that should have tipped me off that my next idea would not work either.
Plan B was to use the Levenberg-Marquardt algorithm to try to fit a generic signal directly to the data. If you aren't familiar with the algorithm, the TL;DR is that it is used to minimize the sum of squares between empirical data and any arbitrary function. It iteratively adjusts the function's parameters until the function is considered "close enough" or until the parameters stop changing very much. So I figured, "sound is just a bunch of sinusoidal waves put together, so I can use a linear combination of sinusoids as the input." The problem here is that noise doesn't really look like "a bunch of sinusoidal waves." Noise is so random that it would take thousands of different waves, each with a different frequency and/or phase, to even come close to modelling it. And the Levenberg-Marquardt algorithm has a complexity somewhere in the order of O(N^2) (Disclaimer: that is a complete guess). In my implementation, trying to fit a function with 7 parameters to a 1-second sample took about 25 seconds. I was aiming for 10-15, and the resulting function was not even close because of the randomness of the noise.
So that's my past week in a nutshell. It's a bit disappointing, because it would have been awesome to create something with that level of technical complexity, instead of the rather trivial stuff I have been working on. Oh well, nothing I can do about it I guess.
Oh yeah, now I'm working on a game. I'll write more about it soon (assuming I remember to post).
Wednesday, June 18, 2014
Lessons Learned: Part I
I'm going to do one of these posts every time I release an app, where I talk about what I learned throughout the development process. As with everything on this blog, hopefully someone will find it useful.
1.) Plan ahead
I'm just going to say this in advance: many of these are going to be incredibly obvious. Including this one.
Before you start, take a few minutes (or hours) to plan your app's layout and figure out what you want in advance. I did this, and it made the layout process incredibly easy and smooth. It also helped me to recognize inconsistencies and issues before I even started writing any code. If you just dive in without thinking about things, there's a good chance at some point you will need to make big changes because you didn't factor in ________. 5 minutes of planning saves 5 hours of headache.
2.) Don't say "I'll reorganize stuff later"
Make your code extensible and reusable from day 1. I made the mistake of writing messy, copy-pasted code everywhere, and it turned out to be a real pain. For example, I have some dialogs that I use in multiple places. When I first started writing the app, I just copied and pasted these where I needed them, because I (for some reason) didn't want to slow down for 5 minutes and think about how I could reuse that code. Then of course, I needed to make changes to the dialogs, which left me scrambling to remember every place I had copied that code. When I would miss one, I would waste time trying to figure out why one dialog worked and the other didn't. At the time, it felt like I was saving myself time and effort, but in retrospect I definitely wasn't. Even if you don't plan on using something again, it doesn't hurt to take 30 seconds to throw it into a function or its own class. Which brings me to #3...
3.) Don't be afraid to extend stuff
This one is actually kind of new to me. Most of my programming experience comes from school assignments, and most in classes don't need to use inheritance at all. The classes that do need it typically give you a very specific architecture that you need to create, and as such you miss out on the practical side of concepts like this. I never really realized how easy it is to modify a class's behavior. For example, bringing up the dialogs again, most of the dialogs that I used had an EditText for entering semester/course/assignment information. I wanted the soft keyboard to automatically show itself as soon as the dialog appeared. (I think I mentioned this in another post.) Anyway, once I found a solution, I ended up copying and pasting it in every single dialog that needed it. Looking back, I could have simply made my own class extending from AlertDialog that could have handled that automatically. And there are a lot of other ways this can help; changing the behavior of an ArrayAdapter, or creating a special kind of Button for example. And if you only need to override one or two functions, you can always use an anonymous class. (I had no idea that you could do this until a few weeks ago. Anonymous classes are now by far my favorite Java feature.)
That's all I've got right now. Basically they all boil down to: don't rush things, and don't avoid a bit of extra work if it will save you trouble later.
Monday, June 16, 2014
GradeBook
Introducing my first app: GradeBook!
GradeBook is an app to help keep track of grades and GPA. Multiple times throughout my academic career I have needed to sit down, pull out a calculator, and figure out:
GradeBook does all of this. You can use as much detail as you want; you could just fill in your GPA for each semester, or if you feel like it, you can add every single assignment and test you have ever taken. GradeBook will take all of your assignment grades and automatically calculate course grades, semester GPA, and cumulative GPA.
Semesters that are currently in progress can be "unlocked", so that the grades from that semester will not be counted in the cumulative GPA. Then once all grades have been finalized, you can lock the semester to see how those grade affected your GPA.
Currently, GradeBook supports courses that are graded either as a sum of points or as a weighted average. Additionally, the curve for each class can be manually adjusted. Ideally, this should cover any grading method that the teacher provides, but in case it doesn't, grades for each course can be manually overwritten.
Download it here:
If you download it, be sure to rate and review! I plan on reading every single review so I can try to keep everybody satisfied.
GradeBook is an app to help keep track of grades and GPA. Multiple times throughout my academic career I have needed to sit down, pull out a calculator, and figure out:
- My cumulative GPA
- My GPA for a single semester
- My current grade in a course
- What grade I need on the final exam to get an A
GradeBook does all of this. You can use as much detail as you want; you could just fill in your GPA for each semester, or if you feel like it, you can add every single assignment and test you have ever taken. GradeBook will take all of your assignment grades and automatically calculate course grades, semester GPA, and cumulative GPA.
Semesters that are currently in progress can be "unlocked", so that the grades from that semester will not be counted in the cumulative GPA. Then once all grades have been finalized, you can lock the semester to see how those grade affected your GPA.
Currently, GradeBook supports courses that are graded either as a sum of points or as a weighted average. Additionally, the curve for each class can be manually adjusted. Ideally, this should cover any grading method that the teacher provides, but in case it doesn't, grades for each course can be manually overwritten.
Download it here:
If you download it, be sure to rate and review! I plan on reading every single review so I can try to keep everybody satisfied.
Thursday, June 12, 2014
Extending ListPreference to use custom RadioButton drawables
 I did some pretty cool stuff today. Actually, I only did one cool thing, since it took me basically the entire day to get everything working. I wanted to add color previews to the theme chooser in my settings menu, but I didn't just want to add a colored square next to the name. I wanted to replace the default RadioButton with a custom icon that would represent the color of the theme. So I had to learn all about custom Drawables... although in retrospect it probably would have been easier to just make an image. Oh well, I guess I still learned a lot.
So this was pretty much the first thing that I had trouble researching online. Turns out, not many people want to do something like this. I will post the code and explain the problems I ran into, and hopefully they may end up helping someone. The end result can be seen right over there... -->
Let me start off with the drawable. It uses two layer-lists combined in a selector, so that the icon can have "checked" and "unchecked" states.
theme_radio_checked.xml
@drawable/check is an image containing the gray check mark. The file for the unchecked drawable is similar, but uses a blank image of the same size. I went with a white background so that later when I use a color filter to change the icon color, it produces the exact color I want, so I don't have do mess around with all the filter types. These two drawables are then combined with a selector:
theme_radio_selector.xml
theme_list_row.xml
Most of that is pretty simple, but I'd like to point out the last 4 attributes of the RadioButton:
android:focusable="false"
This is needed because if you have something in the row that can take focus, you will not be able to select the row. This makes sense for things like buttons, but I want them to be able to click anywhere on the row to select it.
android:button="@null"
android:background="@null"
android:drawableLeft="@drawable/theme_radio_selector"
At first glance, this probably seems like a silly way to add the drawable to the button. I ended up doing it this way to address two problems that I ran into:
1.) If I assign the drawable to the button, there is no way (that I could find) to access the drawable in the code. I needed to access it to dynamically change the color, so that wouldn't work.
2.) If I assign the drawable as the background, it sometimes becomes distorted to fill its spot in the layout. I couldn't figure out any way to force a square layout aside from creating a custom View, which I didn't want to do.
So by turning the button into a compound drawable, I am able to both keep it square and dynamically change the color. Awesome. Finally, I created a custom Preference extending from ListPreference to handle the color changing. The only thing I had to override was the onPrepareDialogBuilder function:
ThemeListPreference.java
(Sorry about the formatting, one of these days I'll get around to editing the CSS of this blog. EDIT: Told you!)
The array adapter handles mapping the entry array to the ListView, but I also had to overload its getView function to change the view as I needed. I discovered that I had to manually check the selected radio button. I then got the drawable with getCompoundDrawables()[0], and gave it a color filter based on which element it was.
Before I implemented the selector, I was able to use ((LayerDrawable) button.getBackground()).getDrawable(0) to change the color of only the background layer, (leaving the check mark pure gray instead of tinting it along with the background,) but I couldn't find a way to get the drawable for a single state of the StateListDrawable. Oh well, I actually like it better this way.
So that's really all there is to it. Seems a lot simpler now that I have it all written out, haha. Hopefully someone finds that helpful.
EDIT: I discovered a bug. With the above code, if you click on the drawable itself, it will appear to switch to the "checked" state, but it won't actually do anything. This is easily fixed by adding the android:clickable="false" attribute to the RadioButton.
Wednesday, June 11, 2014
6/11/14
Getting close now. Monday I added styles and themes to my whole app. I simultaneously love and hate designing things myself... I have the technical skill, but I'm just not that creative. Whenever I design something like this, it never quite looks how I want. But at the same time, I love just messing around with things and seeing how they change. If I had someone else to design everything for me, would that take all of the fun out of it? Hmm...
I can already tell how much better I have gotten at this. Yesterday and today I've just been adding features, but now it only takes me a few hours instead of the entire day. And that is including the time it takes to deal with my incredibly messy code.
Speaking of messy code, I need to clean things up before I release, but it's tough to find the motivation. Things are currently kind of slow and inefficient, but I hate spending so much time working on something that a.) won't really be noticeable to users and b.) will likely introduce some new bugs. I mean, it's better to fix it before things get too complicated, but this app probably won't become that complicated anyway. And I'm so close to finishing that it's hard to work on something that seems so unimportant. But my "good programmer" senses are tingling...
Friday, June 6, 2014
6/6/14
My sloppy code design is really starting to catch up with me. I'm wasting way too much time copy/pasting code in different places, or fixing bugs because I changed a line somewhere and forgot to change similar blocks of code. I'm probably going to have to spend a day or two just cleaning up everything. Hopefully I will plan things a bit better in my next app, because honestly this first one is embarrassingly bad. Good thing I'm not planning on releasing the source code. :p
In other news, I finished the last of my app's core functionality today. I still have a few extra things that I may decide to add, and I know there are a couple of potential bugs still hanging around, but it now officially does what I originally planned for it to do. So that's pretty cool. On Monday I will start looking into themes and whatnot to (hopefully) make things look nice.
In other news, I finished the last of my app's core functionality today. I still have a few extra things that I may decide to add, and I know there are a couple of potential bugs still hanging around, but it now officially does what I originally planned for it to do. So that's pretty cool. On Monday I will start looking into themes and whatnot to (hopefully) make things look nice.
Thursday, June 5, 2014
6/5/14
Haven't had much to write about the past couple of days. Things seem to be going really smoothly; longest I've gotten stuck was for an hour or two, fixing a bug that showed up when I modified my database to cascade on delete. Turned out the SQLiteDatabase.replace function does strange things when the database is set up to cascade, so I ended up re-writing a few functions to avoid using that. Other than that little hiccup, I've been making a lot of progress. In fact, this app should be ready to release by the end of next week at the latest.
I did run into an interesting issue today though. I wanted to make the soft keyboard pop up whenever I show a dialog, so users don't have to tap the text field an extra time. I had to try a couple different things to get it to work correctly.
The first method that appeared to work was to use:
((InputMethodManager)getSystemService(Context.INPUT_METHOD_SERVICE))
.toggleSoftInput(InputMethodManager.SHOW_FORCED,0);
And a similar method to hide the keyboard. But I had some issues depending on where I put the function. Sometimes, it wouldn't show itself, other times it wouldn't hide, even if you quit the app.
I ended up using something like this:
But this had an interesting problem of its own. It worked flawlessly for one dialog (it even knew when to close itself, unlike the other method where you had to force it to close), but when I put the exact same code in another dialog, it didn't work. Both of them started with the correct editText in focus, but the problem was caused by when the field was put into focus. The second dialog used a custom layout, and in the XML I had added the <requestFocus /> tag, because I obviously wanted to start with that field focused. (Turns out I didn't need to, because I guess the first editText is automatically focused, but that's besides the point.) The problem was, because I asked for focus in the XML, the field started with focus before I established the listener. Therefore, there was no change of focus to trigger the listener. All I had to do was remove that tag, and it worked flawlessly. (Ignoring the fact that it will show the soft keyboard even when a physical keyboard is present.)
So yeah, that was kind of interesting. (Finally I can share something helpful that I learned!)
Monday, June 2, 2014
6/2/14
Back from vacation! I feel like I didn't get a whole lot done today, but that's probably just me trying to get back in the swing of things after spending a week in Florida.
I've only been working on this app for about a week and it already feels like my code is becoming... unwieldy. I normally pride myself on my clean and organized code. In fact, I probably spend the same amount of time adding comments and making things look nice as I do writing the actual code. But this time, my code just feels like a mess. I'm not sure if it's because I keep distracting myself by thinking of new bits of code to write, or if I feel pressured to spend less time on comments and formatting so I can release my app sooner. It doesn't help not having an hourly wage; although I'm doing this more for the experience than the money, a little bit of money would still be nice. So functional code seems to be taking priority over beautiful code. Maybe I'll spend a couple hours tomorrow cleaning everything up.
I'm still struggling a bit with handling the activity hierarchy. Namely, if I pass information to Activity A through an Intent, then it can read the Extras from that Intent and everything works fine. But, if I go up from Activity B back to Activity A, then it doesn't use an Intent (or at least one that I wrote), so Activity A crashes when it tries to use information from the Intent that I never added. I imagine that there is a way to handle this... actually, I know you can use startActivityForResult, but I'm not really looking for a result, I'm just trying to display the information that was there before I started Activity B. I've kind of worked around it by calling onBackPressed every time someone clicks up, but I feel like that might not always work depending on what I decide to add.
Finally, Game of Thrones season 4 episode 8... HOLY CRAP
Friday, May 23, 2014
5/23/14
Wow, I feel like I got a ton of stuff done today! I ended up going with an SQLite database to store everything to avoid those issues where data was being lost in between Activities. I was originally avoiding using a database because I'm don't really like working with SQL, but when I sat down and worked everything out it turned out pretty well. Now I really appreciate the database setup they had at my internship last summer... I thought it was pretty complicated back then, but I can definitely see the advantages compared to my code
Of course, switching things to a database meant that I had to go back and basically rewrite everything that was using that data. There's a lot of trial and error here. But I guess it's worth it, because every time I am forced to go back and rewrite code, I learn something new.
So yeah. Don't try to avoid the more complicated way of doing something if it is the correct way.
In other news, I'm going on vacation for the next week, so no more posts for a while. Yeah, that's right, I'm talking to you, random 1-ish viewer per day. Don't miss me too much.
Thursday, May 22, 2014
5/22/14
Got a lot done today. Like I said in my last post, I removed my custom ArrayAdapter in favor of the SimpleAdapter class. I got that working, and everything seemed awesome until I tried to update it. Turns out SimpleAdapter is meant to be used on static data, so updating it is kind of a hassle, and not very efficient. I ended up going back to my custom adapter (thank God for version control), which I was able to extend to work with all of the other ListViews in my app.
I also figured out how to make a dialog with a custom layout. Ran into a few issues, but eventually got it working.
Now I'm stuck trying to figure out why, as I go up/back in my app, none of the objects modified in the child Activities are being updated. I guess I must be making a copy somewhere when the child Activity is first started? Looks like I've got some debugging ahead of me tomorrow.
Wednesday, May 21, 2014
5/21/14
Yesterday I watched so many tutorial videos that I fell asleep during the last one. I learned a lot, but I won't be doing that again. I then started designing the layout for my first real app. I've already run into a couple of interesting design issues. Coming from classes in school with pretty strict requirements, I'm not really used to having this degree of freedom. It's pretty cool though.
After I got all the concepts drawn out, I started to actually implement my design. I'm glad I took a few hours to draw out all those concepts and figure out as much as possible, because it has already clearly made my job easier. Definitely something I will continue to practice for future apps.
The rest of my day was spent implementing a custom ArrayAdapter so I could use a ListView with some custom classes. I did eventually get it working, but then I found out about the already existing SimpleAdapter class that can apparently do exactly what I needed. So I will probably end up scrapping the class I made in favor of this SimpleAdapter, since my class wasn't very good anyway.
Monday, May 19, 2014
Day 1
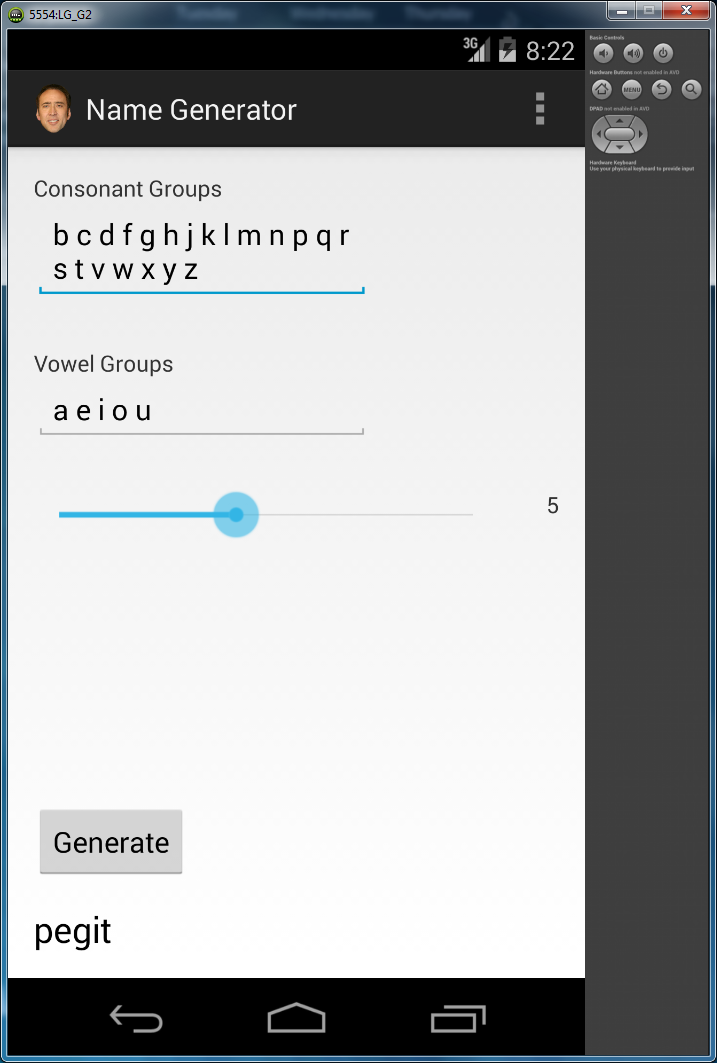
I've already made a surprising amount of progress. I was able to learn a lot of the basics and get used to Android Studio in only a few hours. A good portion of my day was spent just trying to get my phone to accept my computer's fingerprint so I could install my test app on my phone. I tried a dozen different things, but I could never get the fingerprint dialog to show up on my phone. Turns out my ANDROID_SDK_HOME environment variable was pointing to the wrong location. Must have been left over from the first time I attempted to install the Android SDK a few years ago.
I spent the rest of the day writing a simple app to help me practice some basic concepts before I start the real stuff. I'll probably end up posting the source code on GitHub, since it's a pretty basic app and I don't really plan on doing anything with it.
Today I learned about some basic components and listeners and a lot about the different layout styles. But most of my time was just spent getting everything set up and working.

Yeah, I'm having fun with this.
I spent the rest of the day writing a simple app to help me practice some basic concepts before I start the real stuff. I'll probably end up posting the source code on GitHub, since it's a pretty basic app and I don't really plan on doing anything with it.
Today I learned about some basic components and listeners and a lot about the different layout styles. But most of my time was just spent getting everything set up and working.
The app takes a list of consonants and vowels, and alternates them to create a random name of specified length. Pretty simple, but I've already learned a lot.
Yeah, I'm having fun with this.
Introductions
This is my first post on here, so I suppose I should introduce myself. I go by 0x5453, and I am currently a student, in between my 4th and 5th years of studying Computer Engineering and Computer Science. I decided to spend the entire summer learning about Android development, and I am going to use this blog to document my progress. I have a couple of years of Java experience, but virtually no Android experience, so I figured this whole process might be a good thing to keep track of.
So here we are. I will be using this blog to post my thoughts at least a few times a week. Hopefully some other aspiring developer will read this and find some useful information. I will also use this as a hub for my apps... once I actually have some apps, that is.
Stick around, read some stuff, maybe learn... or maybe laugh at my terrible code. We will see.
Subscribe to:
Posts (Atom)